May 28, 2007
This article is a tip for anyone who's looking for a way to get fast Internet service in Loreto, Baja or anywhere in Mexico or North America. As Janelle and I prepare to build our house in Loreto, I wanted to make sure we had some way to communicate with our friend Thadius, who will be monitoring the construction.
A HughesNet satellite dish sits in our living room
Since we are renting a house, it would have been complicated to order high speed internet service in Loreto. The house currently doesn't have a phone, so even if our landlady would have agreed to it, it would have taken a long time (and would have cost a bundle) to get properly hooked up.
After a bit of research I found the solution: satellite Internet service from a company called HughesNet (www.HughesNet.com). We are currently getting 1.5 Mbps download and 200 Kbps upload in Nopolo, Loreto. That's plenty for browsing, email and even Vonage/Skype service!
See below for tips on how to order, pack and install a dish so you can get DSL speeds in Loreto or anywhere in Baja California.
Here are the steps I took to have a working high speed internet connection in Loreto, Baja California Sur (BCS), Mexico. Please note that prices, availability of service and speeds may vary - I am only providing this info for reference.
1) Step 1: Order HughesNet equipment and service
2) Step 2: Disassemble Dish
3) Step 3: Re-assemble Dish
4) Step 4: Install Dish and hook up modem
Below I provide more details and some pictures of the process.
Step 1: Order HughesNet equipment and service
The first step to get your Internet connection working is to order a HughesNet satellite dish, a tripod and a modem. You can purchase the equipment used on eBay (here's a sample search for "hughesnet dish"), but I chose to directly buy it from HughesNet. This way I got everything I needed: the dish, a tripod, the modem, a warranty on all equipment, and the monthly service. Click here to learn more and sign up.
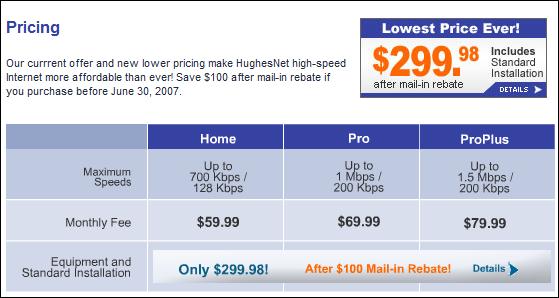
The HughesNet pricing plans in May 2007
HughesNet will charge you for the installation when you activate a new account, so count on spending $299 to $399 to get started (they currently offer a $100 rebate). In addition the monthly service starts at $59.99/month for the basic plan (700 Kbps download, 128 Kbps upload). I chose the "Pro Plus" plan for an additional $20/month which gave us double the speed on the download (1.5 Mbps) and almost double on the upload (200 Kbps). A few notes:
- Due to the high latency in Satellite internet connections, there's a delay in Voice over IP services. When you speak it takes a few seconds for the other party to hear you, and sometimes the speech is broken up. That said, we signed up with Vonage (www.Vonage.com) so we can make and receive unlimited calls from anyone in the U.S for $24.99/month; considering the hundreds of dollars we'd need to spend on broken up cell phone calls, this is a great deal (more information on Vonage service below).
- HughesNet limits you to 370 MB of data per day. This is more than enough for regular browsing, email and even for Vonage phone calls, but if you start downloading or watching videos on YouTube.com, you may reach the limit. In this case, HughesNet will switch you to dial up speeds (56 Kbps). They call this the "Fair Access Policy" (FAP) - I guess it's fair for them.
Once you sign up, you'll get a call from your local US installer. I explained my situation and asked the installer to activate (or "provision") my modem so that I would simply be able to set it up in Baja. A couple of days later they delivered everything I needed: the satellite dish (assembled), the tripod (disassembled), a HughesNet modem, and 50 feet of double coaxial cable.
Step 2: Disassemble Dish
I need a way to get the dish and the rest of the equipment down to Loreto, so I chose to disassemble the Satellite dish so I could pack it up. Here are the detailed steps on how to disassemble it - click on any image to view a bigger picture.
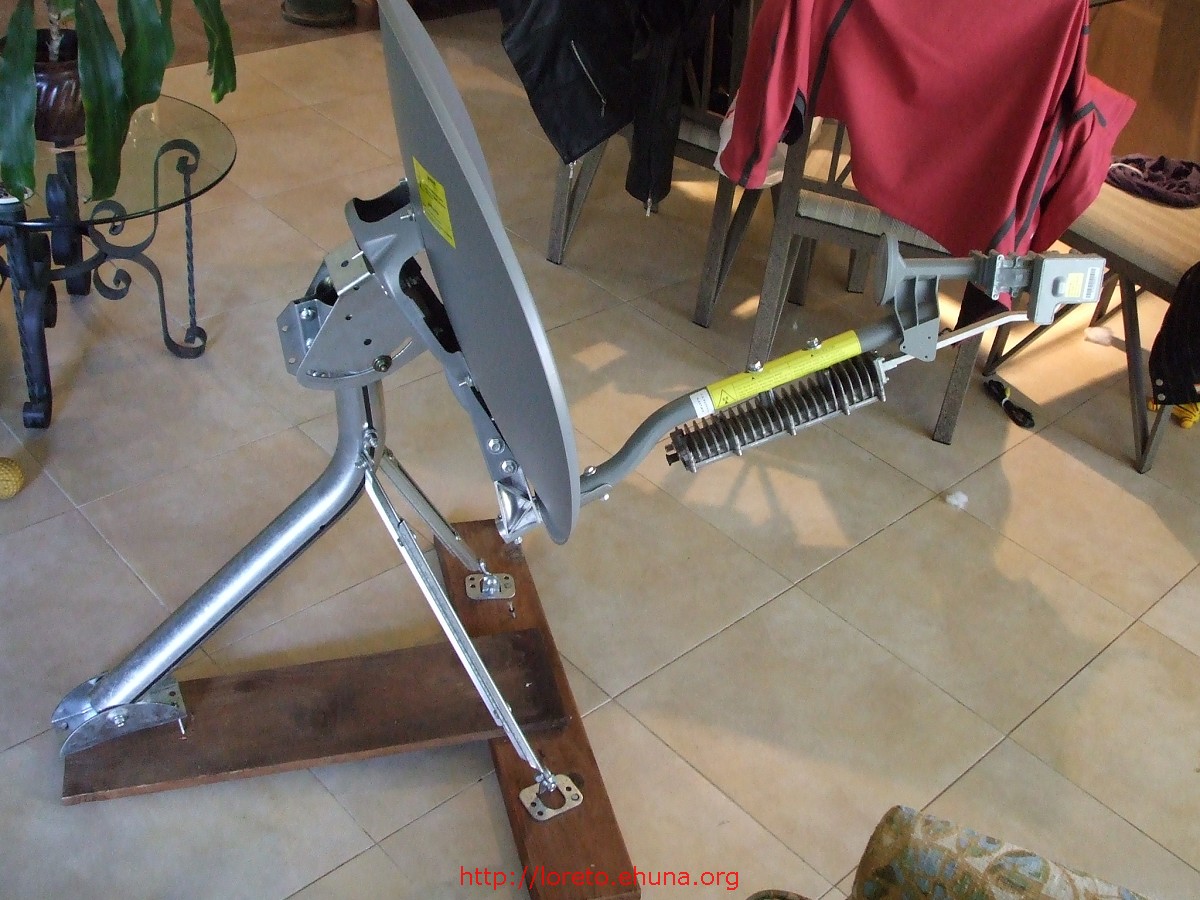
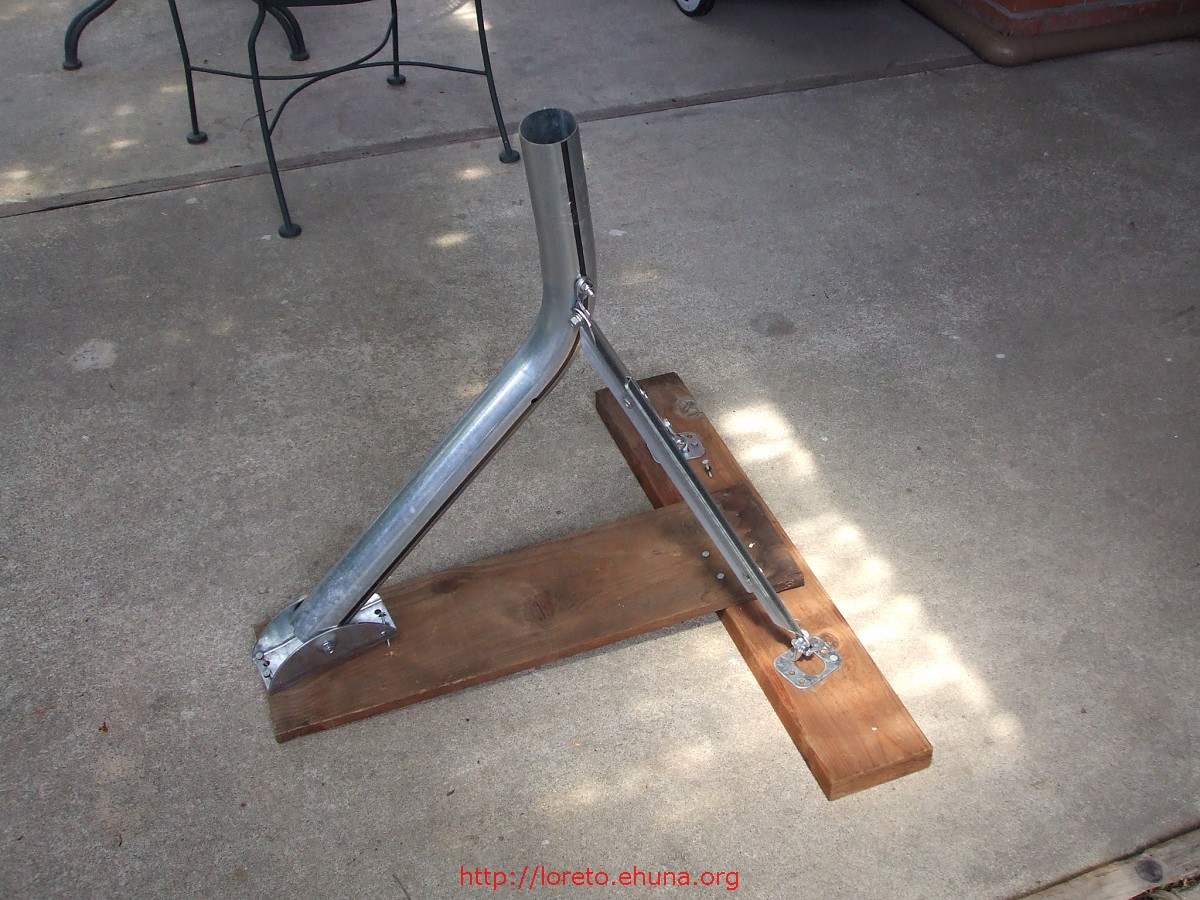
You'll notice that I mounted the dish on its tripod using a couple of 2x4s. I was trying to test the dish and modem while I was still in the San Francisco bay area. Unfortunately that was a bad idea: after a week of trying to get a lock on the satellite, I gave up. I think that having it mounted on the 2x4s simply didn't give me any chance of setting up the correct angles; but it gave me plenty of experience in assembling the whole system, so I could write this article, so it wasn't all bad. ;-)
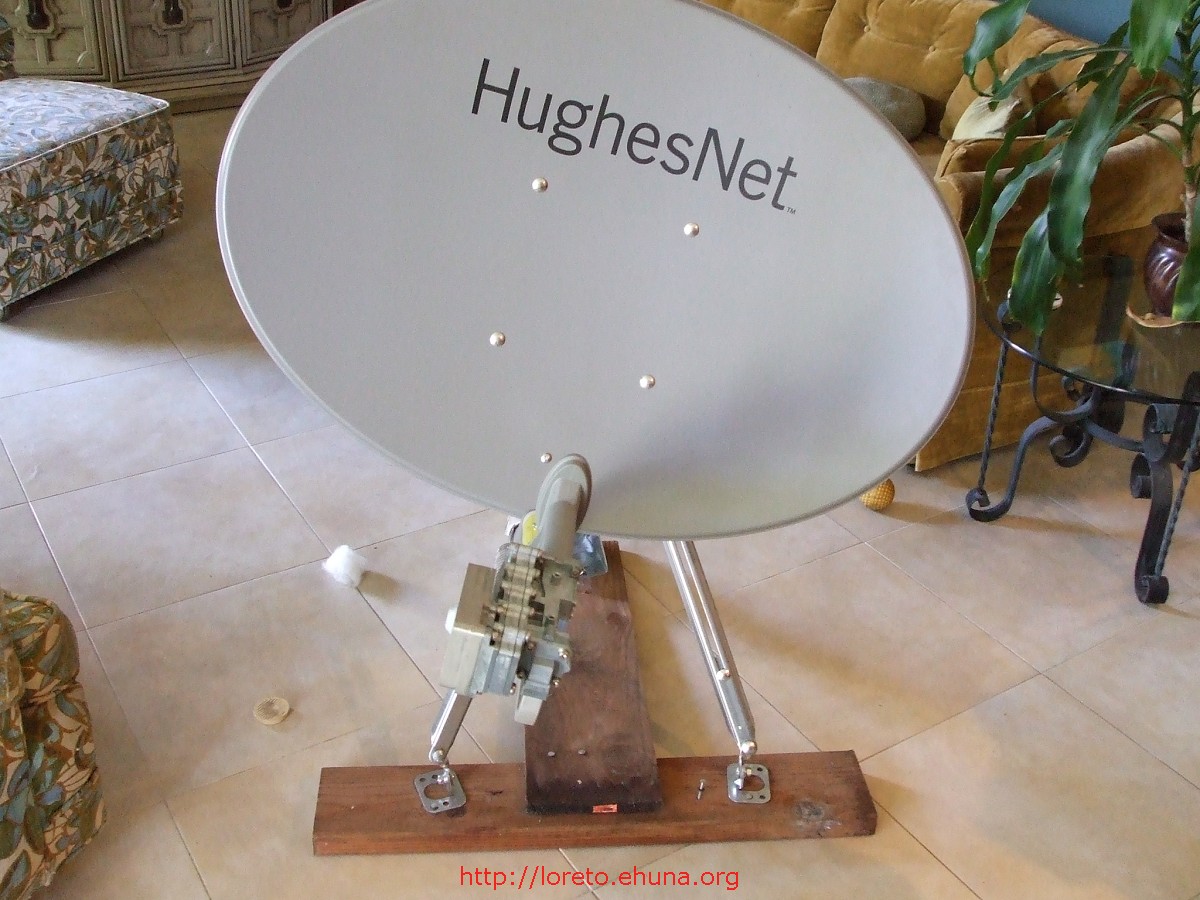
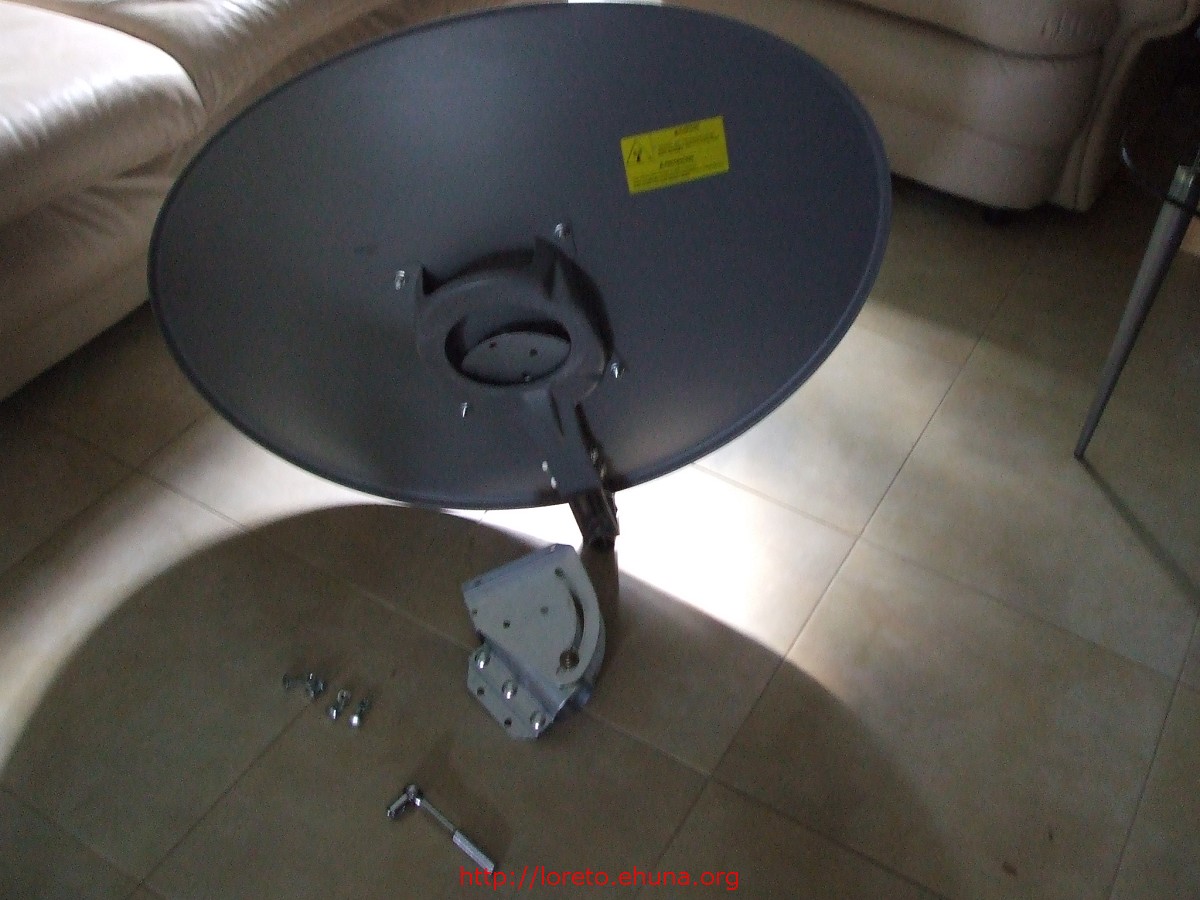
2.1 Here's the HughesNet satellite dish fully assembled (front)
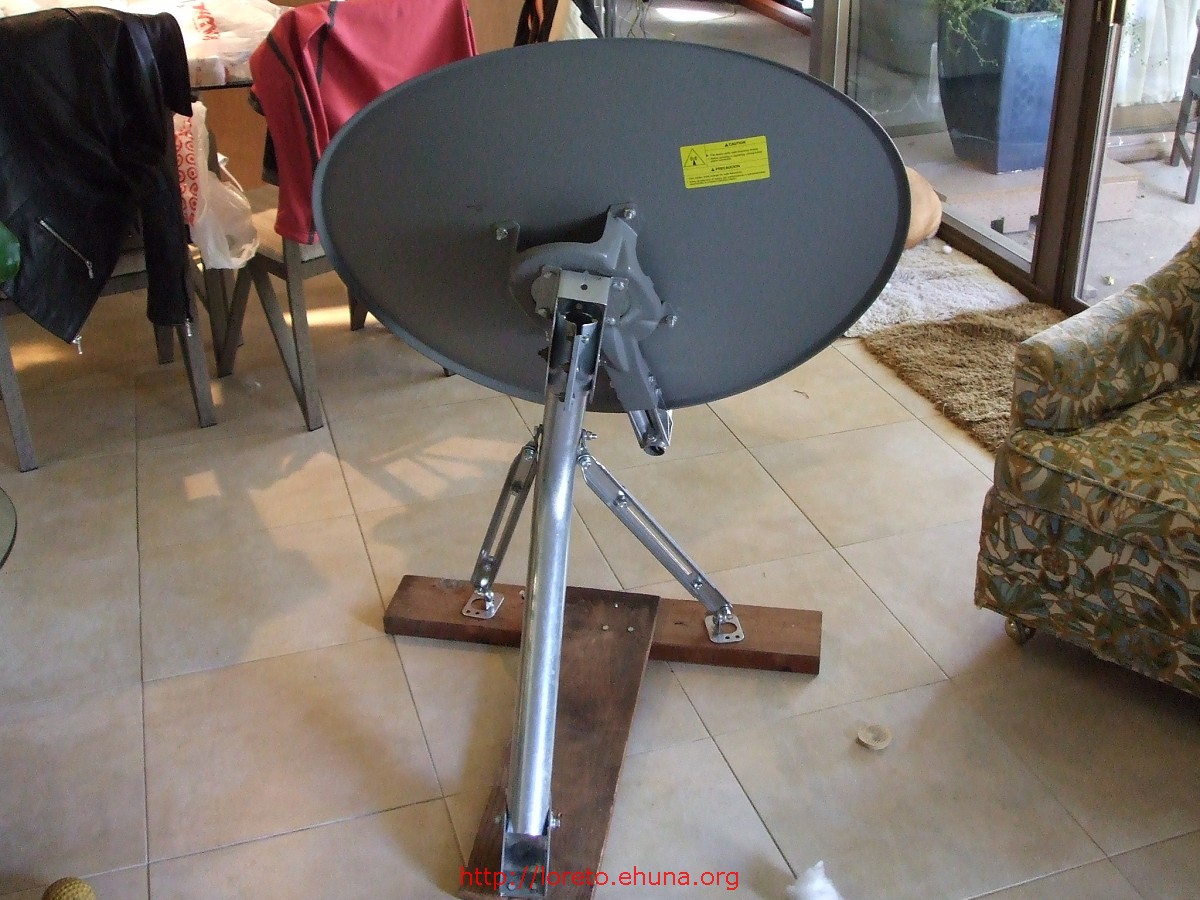
2.2 The dish fully assembled again (back)
2.3 The last picture of the dish fully assembled (side)
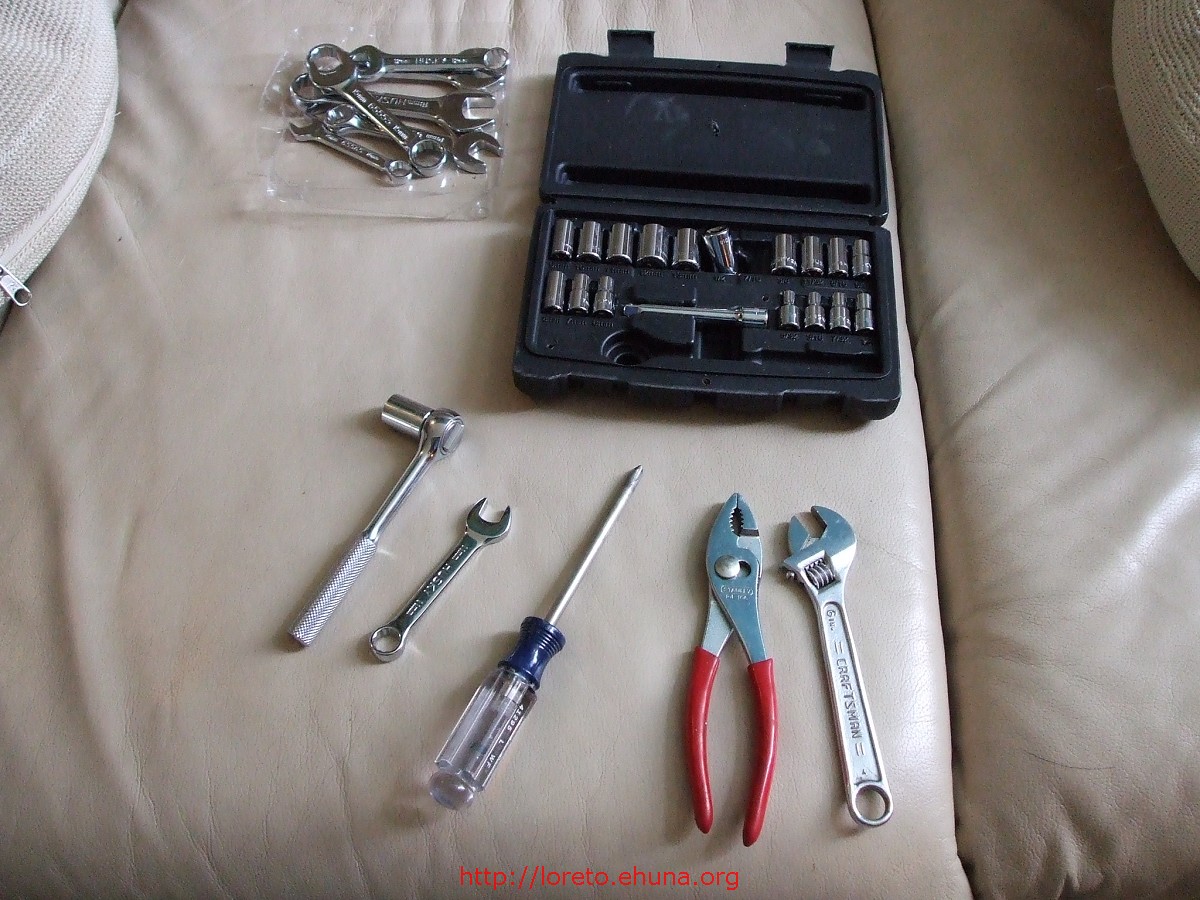
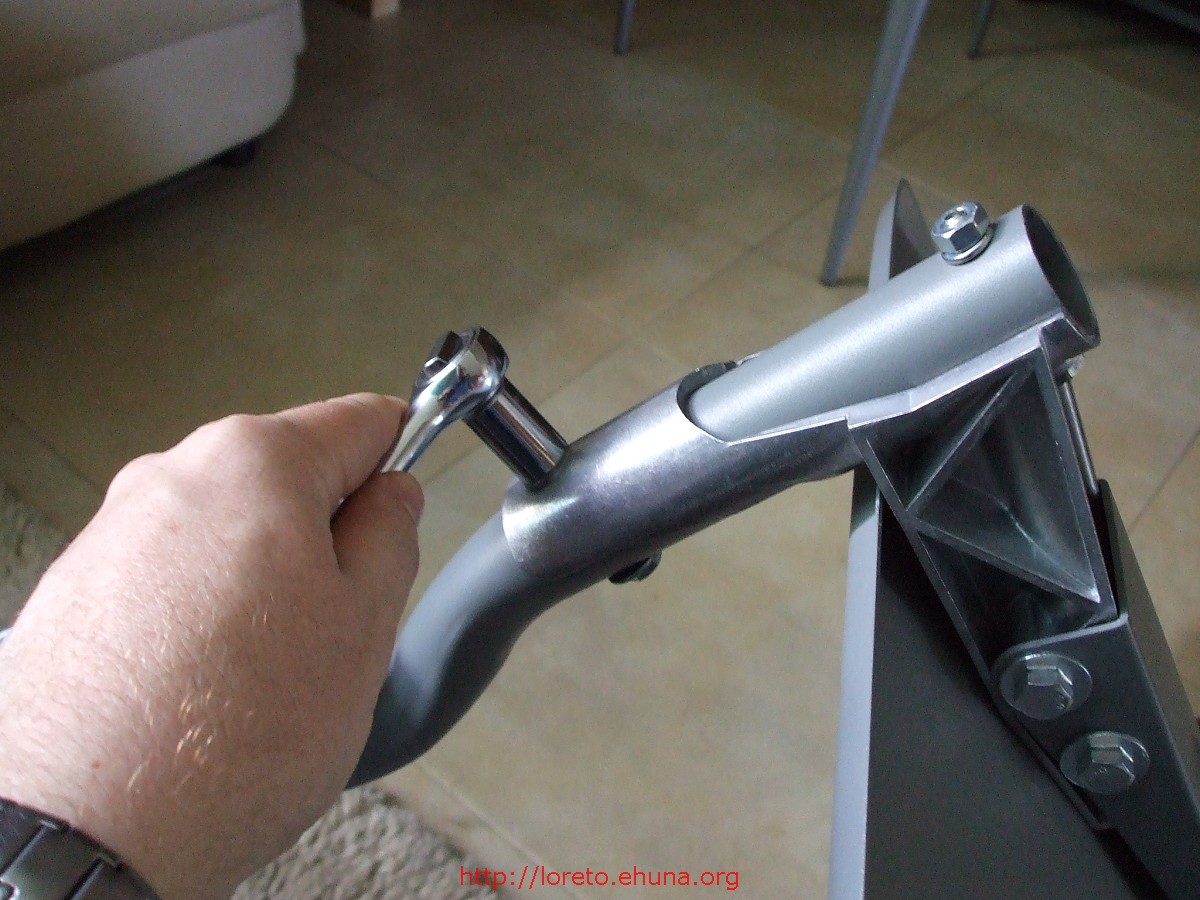
2.4 The tools you'll need to assemble or disassemble the dish and tripod
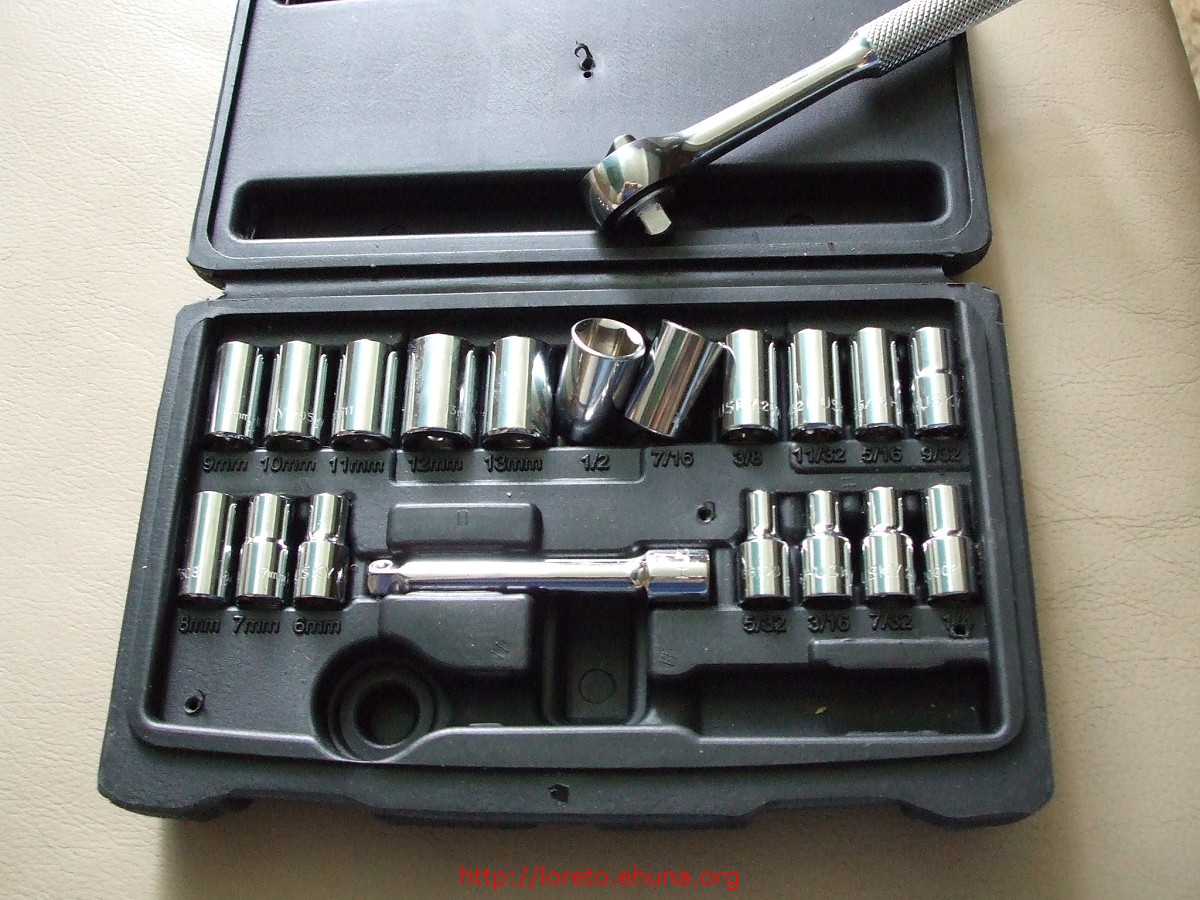
2.5 I got this socket wrench kit at Home Depot for $19.99

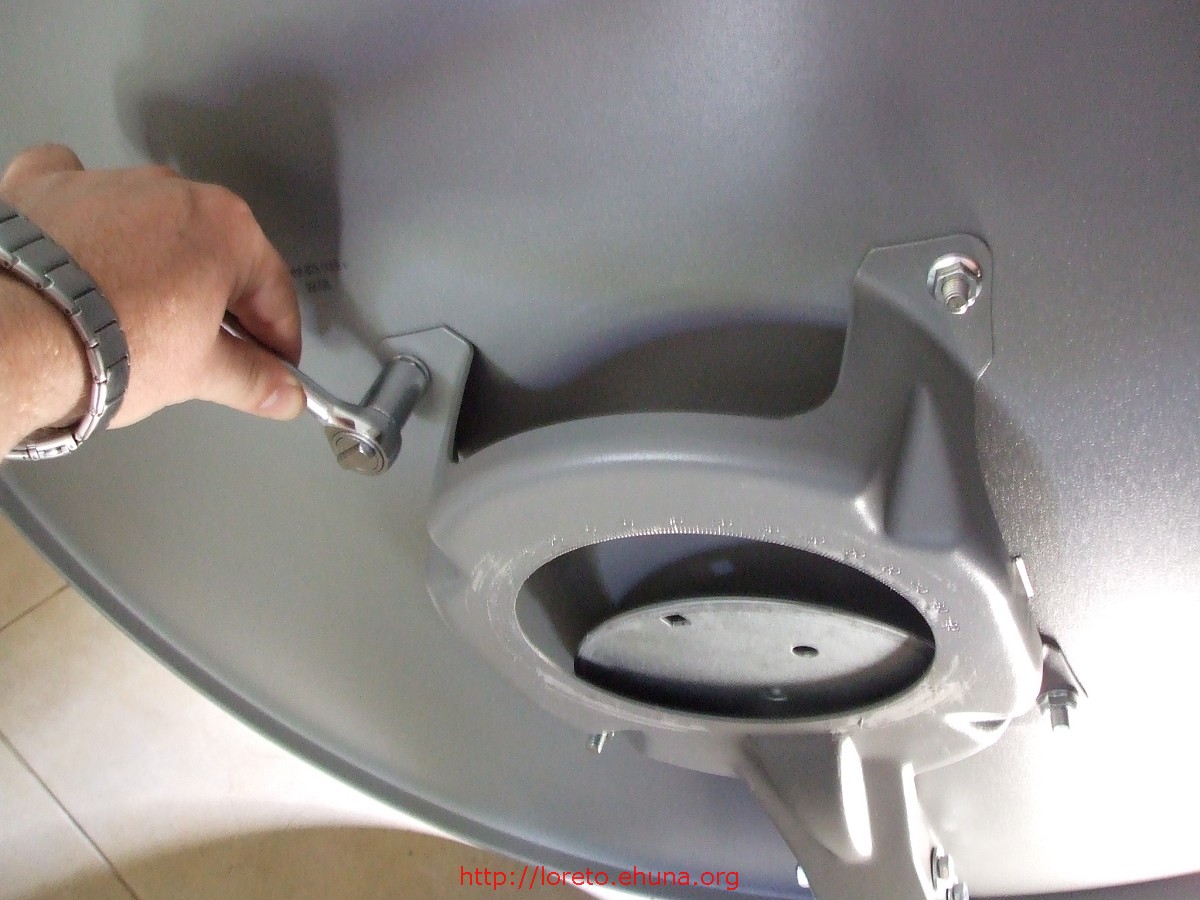
2.6 You'll mostly be using a 1/2 inch socket, although sometimes the 3/4 is needed
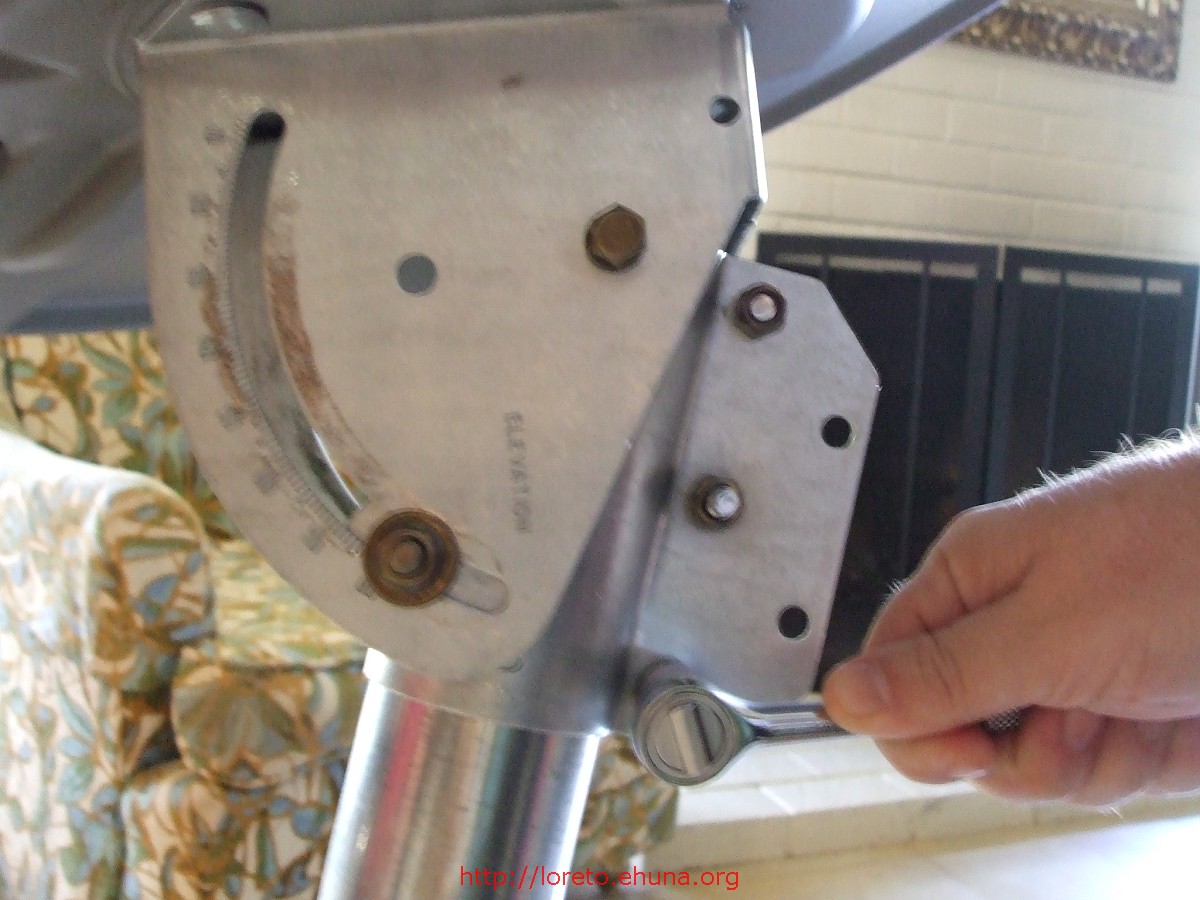
2.7 Start by removing the three nuts from here
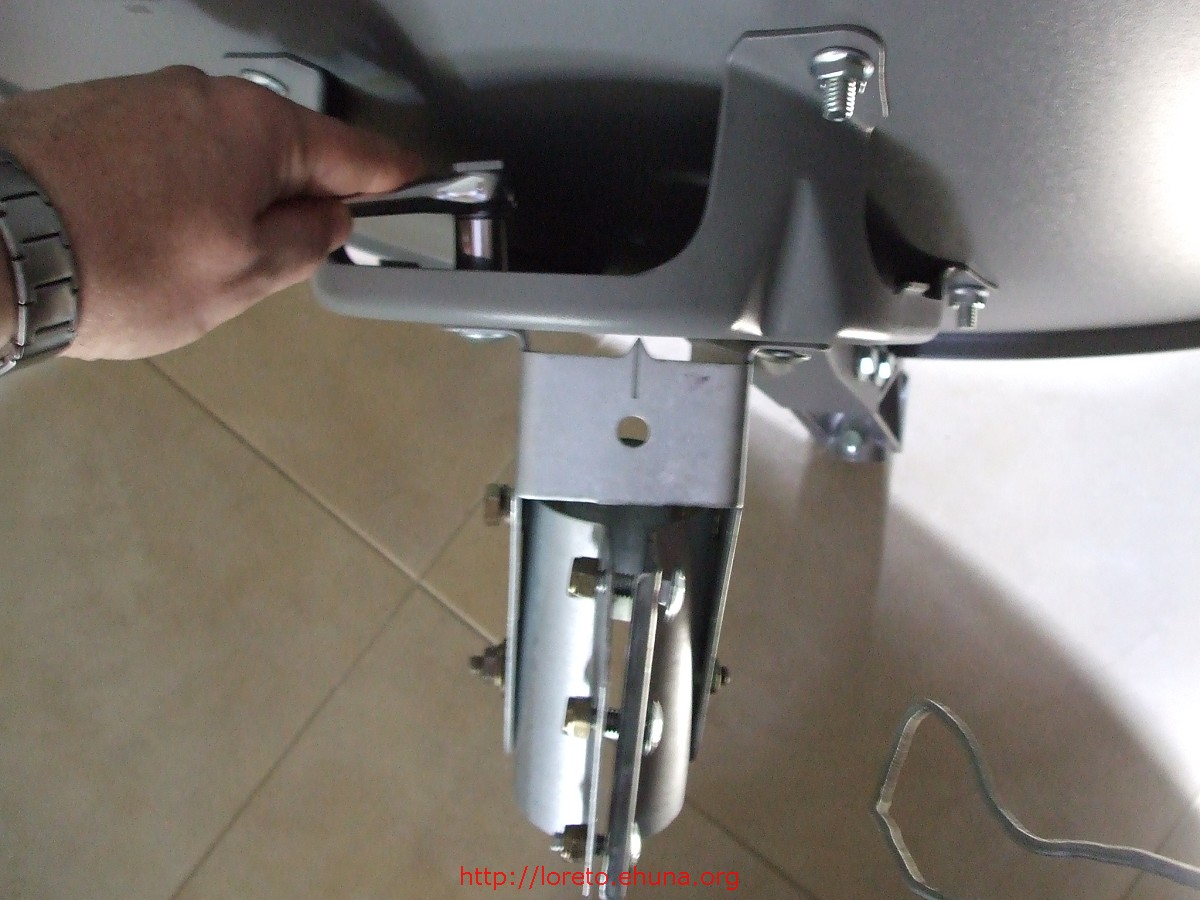
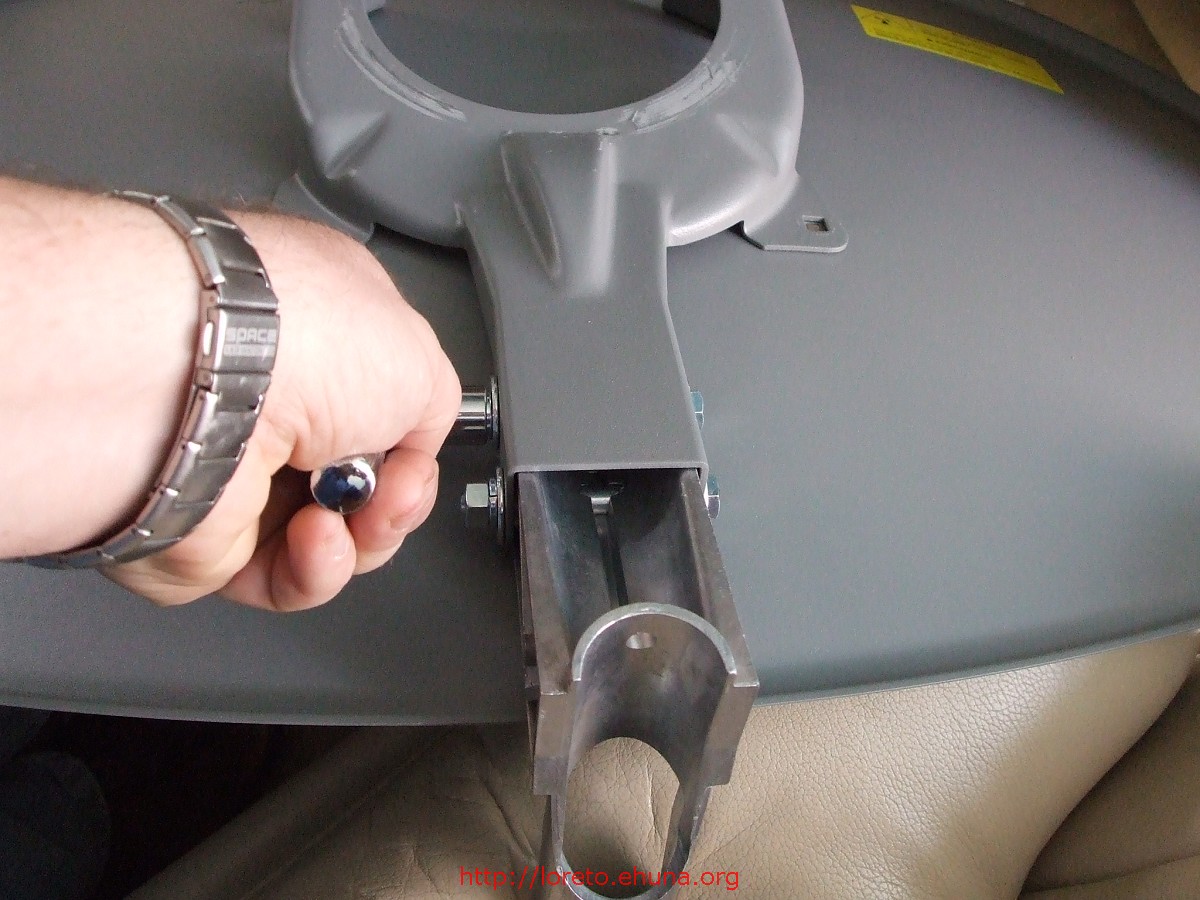
2.9 Now remove 4 nuts from the center piece
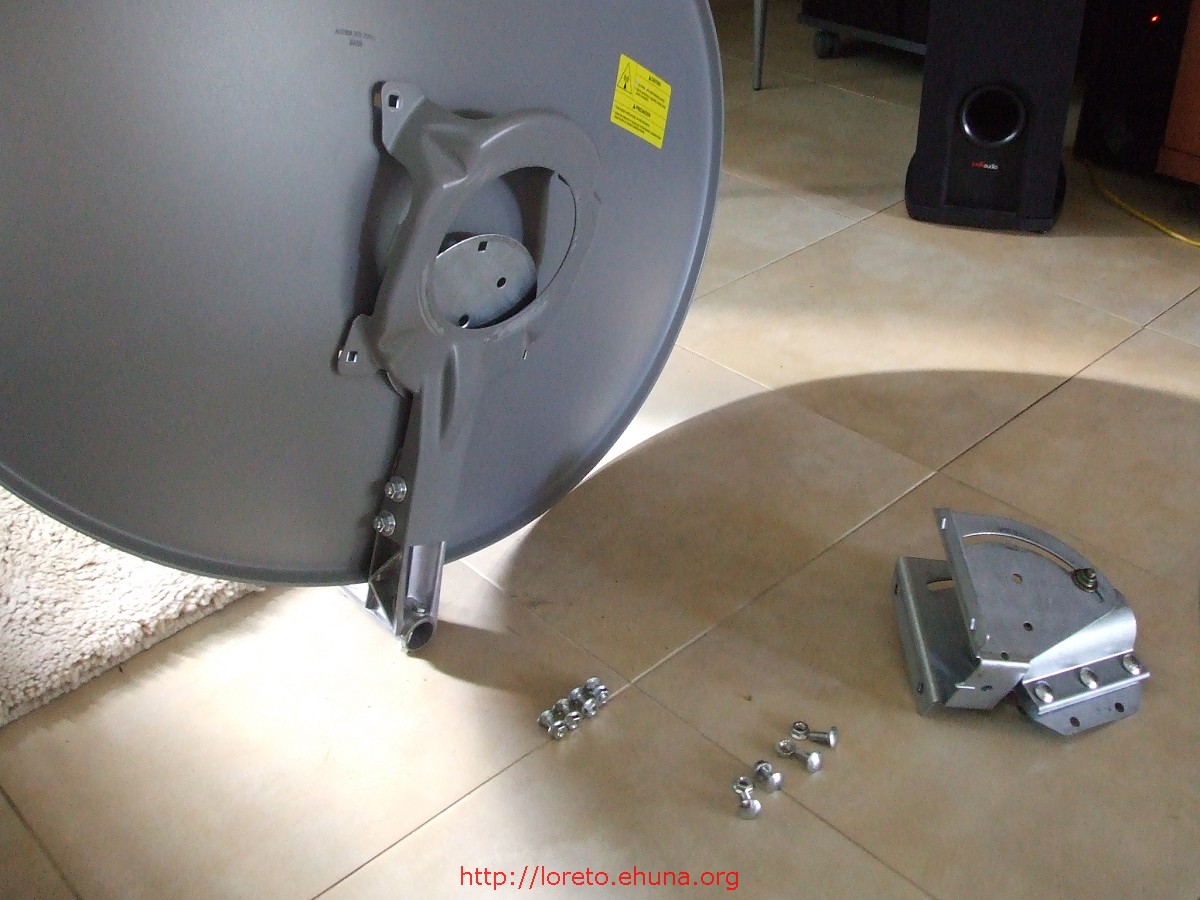
2.10 You'll end up with the piece responsible for the elevation separated from the dish
2.11 Next remove the 4 nuts that attach the back to the dish
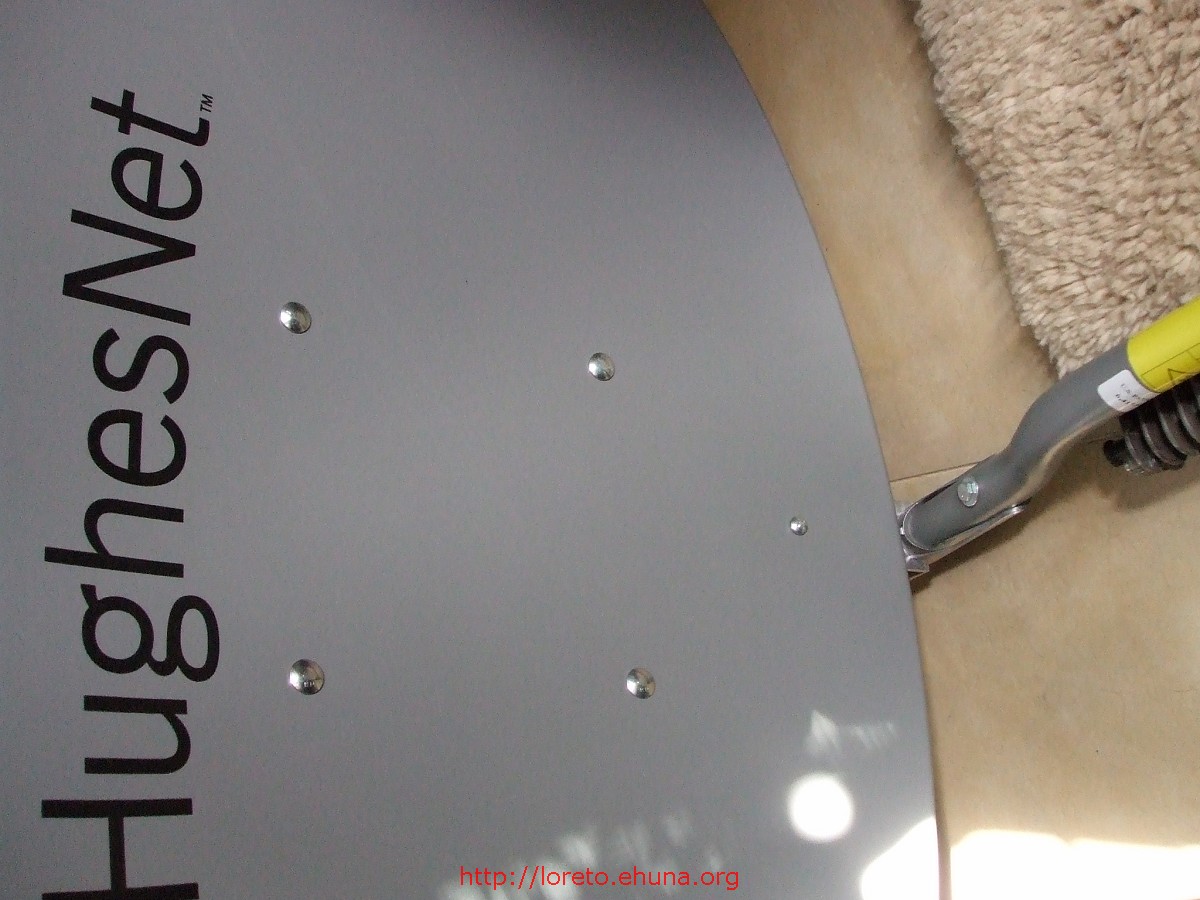
2.12 From the front you'll see there are 5 nuts, but we'll take care of the 5th one at the bottom later
2.13 Here's what it should look like after the 4 nuts are removed

2.14 You can now turn the dish upside down and remove the metal circle from the center
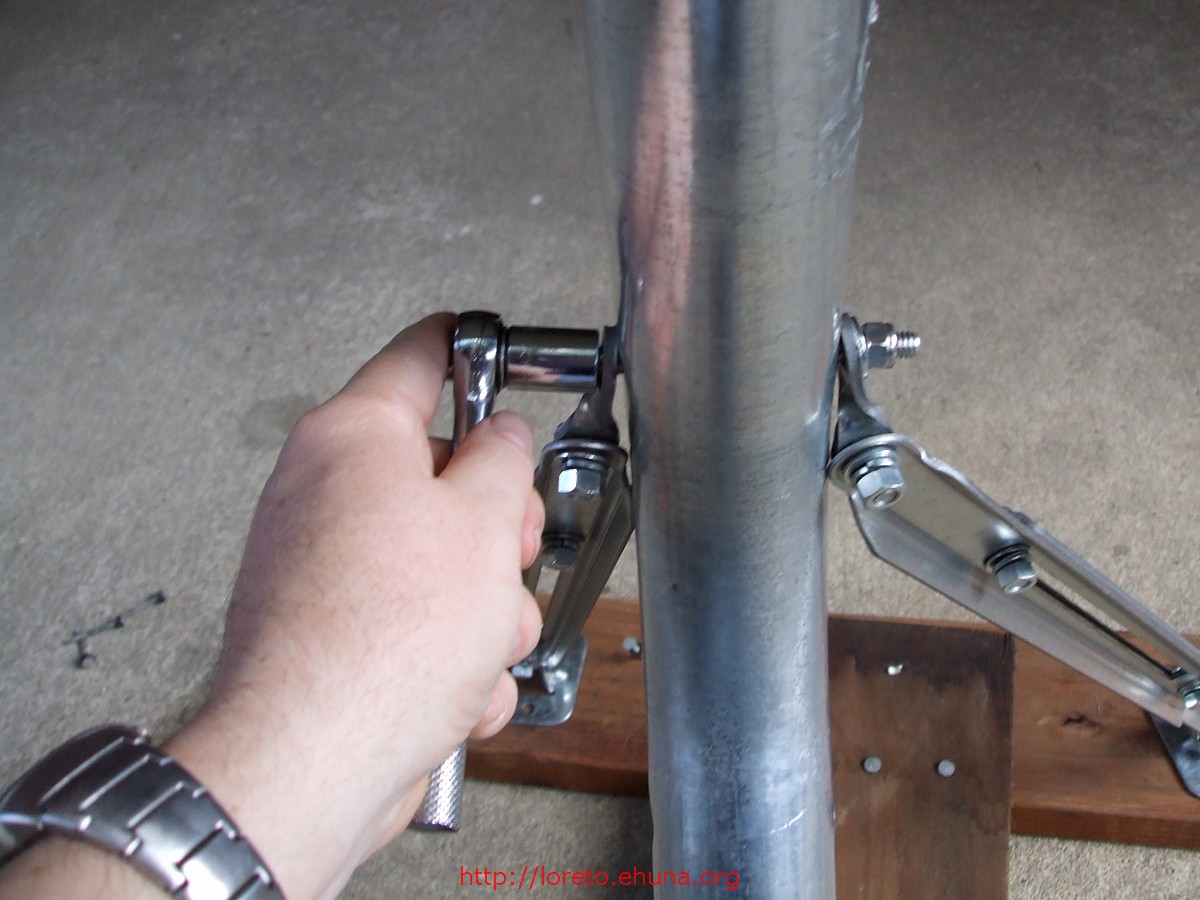
2.15 Remove the two nuts that hold the LNB bracket

2.16 The dish and bracket will now be completely separated
2.17 Now remove the two nuts that hold the back piece
2.18 This what it looks like after they're removed

2.19 Use a screwdriver to remove the last nut

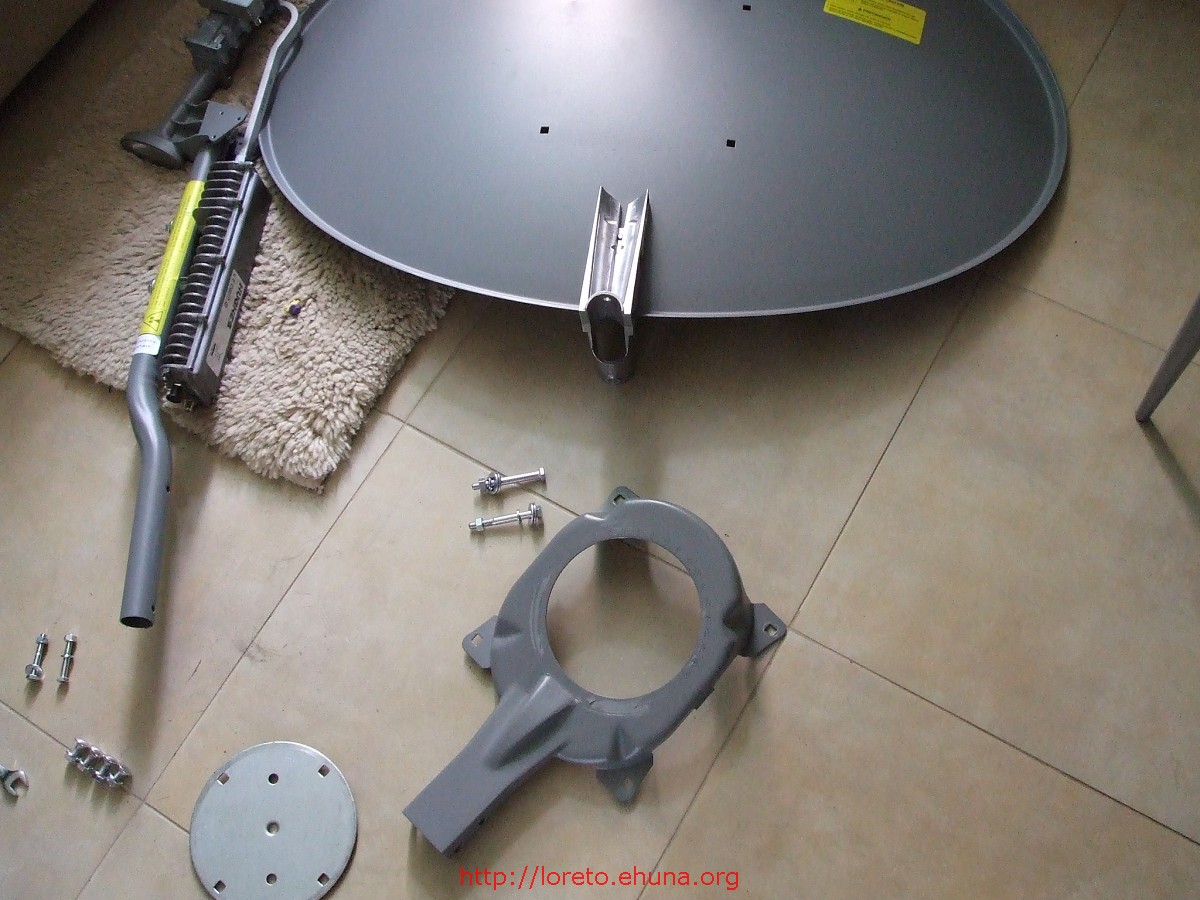
2.20 You're done! Here are all the pieces together.
2.21 Next let's disassemble the tripod
2.22 Remove these two nuts
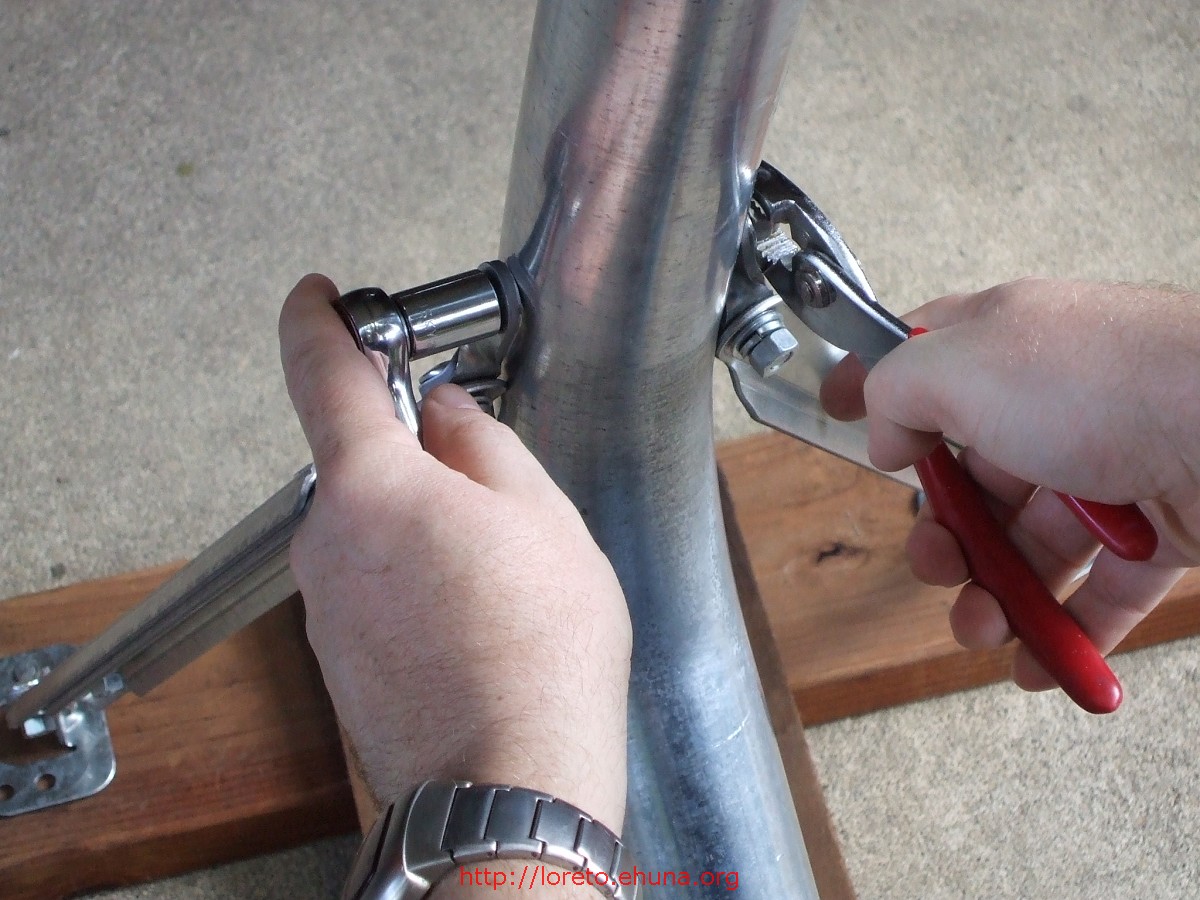
2.23 Use a pair of pliers if needed
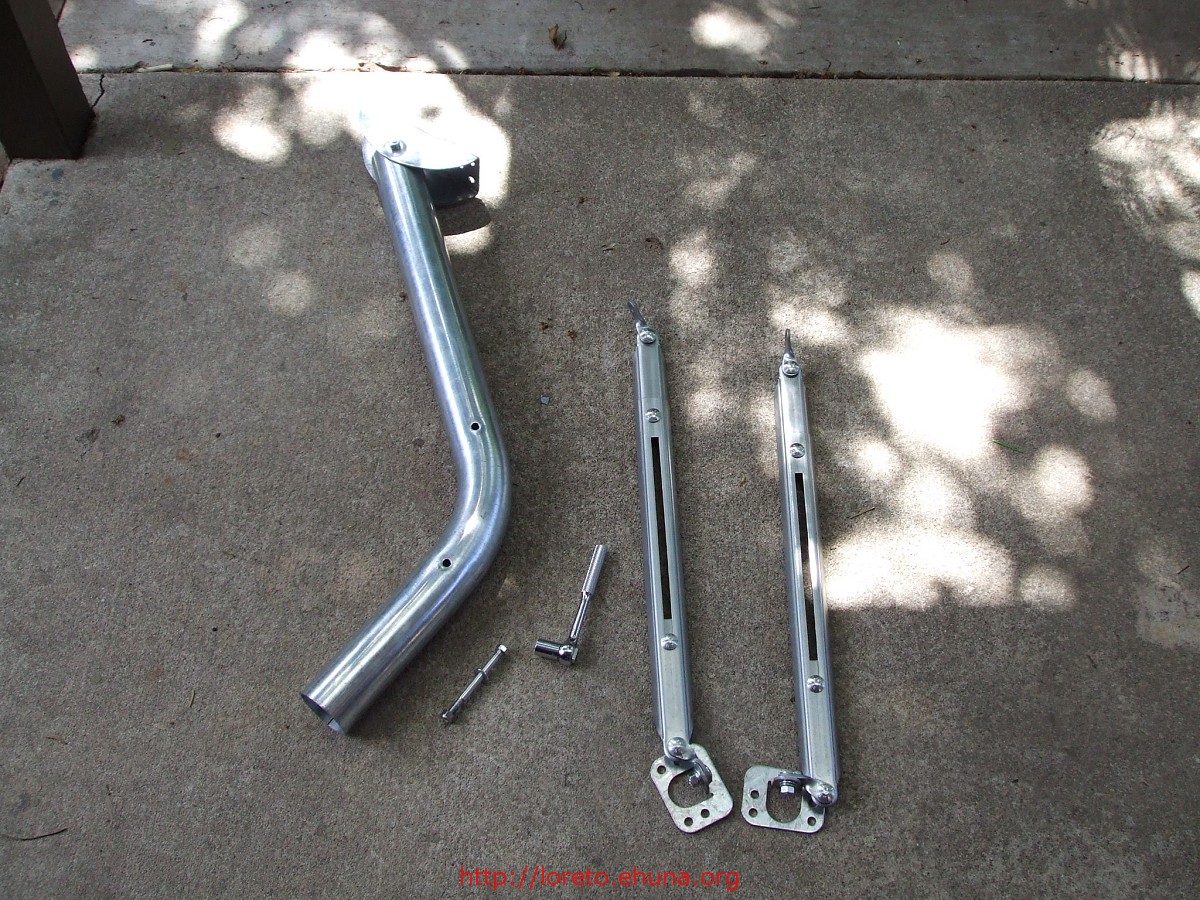
2.24 Here are all the tripod pieces when disassembled
I packed every single piece above across three different suitcases. I took the main dish to a UPS store and for $20 got it in a box with a bunch of bubble wrap around it. This box ended up being 64 linear inches (width + height + depth), which is over the maximum 62 linear inches allowed by Alaska Airlines, so we had to pay another $50 to take it with us. I declared everything at the Mexican customs and had no problems getting the Dish into Mexico.
Step 3: Re-assemble Dish
When you arrive in Mexico (or wherever you end up landing), simply follow the steps above backwards to rebuild the Dish. This is where you'll appreciate properly packing every piece in a towel or bubble wrap so it doesn't break during the trip.
Step 4: Install Dish and hook up modem
The last step is to properly mount the dish in the roof of your house and point it to the correct satellite. I spent a few hours trying this on my own, but had no luck. I didn't have the correct tools to mount the dish or to get a lock on the right satellite.
If you are in Baja Sur, I recommend "Los Frailes" who ended up installing and configuring the dish and modem for Thadius after we left. You can contact "Los Frailles" in the Baja Nomad forums (http://forums.bajanomad.com/), or shoot me an email if you can't find him.
Conclusion
In many ways we are pretty lucky we live in 2007 - the ability to get a fast internet connection almost anywhere in the world is pretty sweet. It allows us not only to email and talk to Thadius, but will also allow us to get full updates on the construction progress through pictures and videos he'll send us. Now let's get this house built!
Additonal notes on Vonage service
On the BajaNomad forums, regarding the Vonage phone service, someone asked: ""what kind of a delay do you get?" and "is this comparable to a land-line phone call? If not, what's the difference?". I thought I'd copy my answer below.
The answer will depend on your Internet connection:
1) I use Vonage as my main line in the San Francisco Bay Area. We have a cable modem connection with high download/upload speeds and low latency. So the call quality is extremely good - we don't see any difference comparing it to a land-line or cell phone call.
2) For the Vonage service using the HughesNet internet satellite, that's another story. There's plenty of bandwidth for Vonage (Hughesnet has 1.5 Mbps down/700 Kbps up, while Vonage only needs 90 Kbps). But the latency, or the time it takes for a "network packet" to go from point A to point B is very high (due to the Satellite connection).
So there will be 3-4 seconds of delay between the time I stop talking and my buddy hears me (or vice-versa). We now use the word "over" after we end a sentence, similar to hald-duplex radio protocols.
In addition the call will be clear to the person on the Loreto side (with the HN satellite connection), but can easily break up on the other side. This is due to the low upload speed which peaks at 200 Kbps, but sometimes can be much lower.